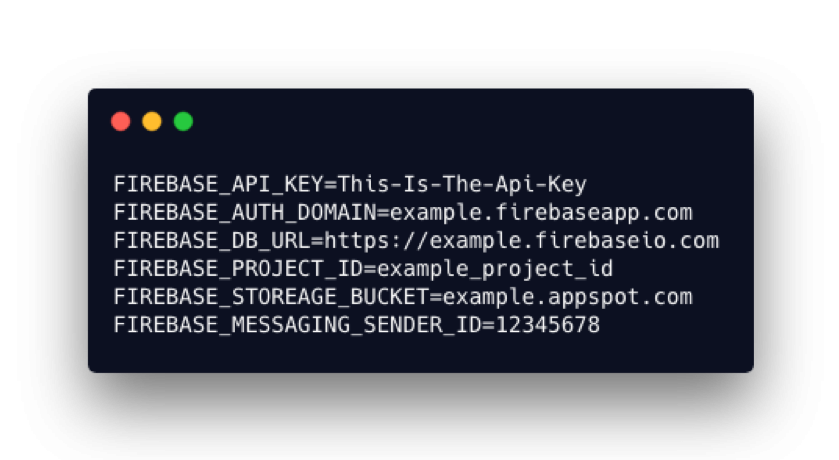
Configure Frontend Projects with Dotenv
There is a very important task in every development project: handling secure data (such as API keys) in the project’s repository.
In previous years, I came across many approaches to resolve this issue. Some of them did a pretty great job, but others didn’t resolve it at all.
In this post, I’ll show you step-by-step how to configure frontend projects using dotenv with .env file, dotenv and convict npm packages. This configuration works with any frontend app that use webpack to bundle the application.
At the end of the post, you will also see two example repositories (Angular and Vue.js) that use this integration.
Before we jump on the frontend configuration, first check how the backend config is managed.
Backend side config management with dotenv
I took part in several Node.JS projects, and I think on backend side config management, the first class citizens are .env files with dotenv and node-convict.
Dotenv is a module that reads .env file content and stores those at the node’s global process.env variable.
Node-convict is a JavaScript library that can load inline config parameters, default config json files and the environmental variables at runtime.
These packages work well with TypeScript if you install the @types/convict and @types/dotenv typing packages.
Frontend side config management with dotenv
Let’s take a look at the front-end side.
This approach won’t work on the browser, because these packages reach the file-system to read .env files.
This is the main part of integrating convict and dotenv to frontend projects, which is far from the simplest thing ever. We found a method to inject these variables to any webpack project at the building step of the application.
Webpack is a module bundler for JavaScript (and TypeScript) applications. Webpack works with loaders, and a loader can help Webpack convert other file types to valid js modules.
Basically, we can create regular expressions to define which files should be processed by which loaders.
At the moment, webpack is the bundler of the main frontend libraries/frameworks. Angular, React and Vue has its own starters, which were built on top of webpack. These starters are
Angular-CLI, Create-React-App, and Vue-CLI. In these starters, you can use any webpack-loader.
Loaders’ configurations are often declared in the webpack.config.js file, similar to the following code:
module.exports = {
  module: {
    rules: [
      {
        test: /\.(png|jpg|gif)$/,
        use: [{ loader: 'file-loader', options: {} }],
      },
    ],
  },
};
The problem with this approach is that these starters have their own configuration files and hide those from developers.
Luckily, this issue can be solved with inline loaders. You can define a loader pipeline in your require or import statements; here is an example:
import Styles from 'style-loader!css-loader?modules!./styles.css';Implementing our own dotenv config loader
Our config loader will heavily depend on webpack and loaders, especially the val-loader.
This little loader will help us create our config module at build time.
This is necessary because dotenv and convict modules use the node’s process.env variable, which is only available when building the application.
Let’s see some code.
First, we should install dotenv and convict packages:
npm install dotenv @types/dotenv convict @types/convict --save-devNext, we should install the required val-loader:
npm install val-loader --save-devWith the help of val loader, we will import the configuration, which presents in the .env file. In this example, we will only parse the NODE_ENV variable.
Important: we should always add the .env file to .gitignore to prevent committing it since it often contains sensitive data.
Here is the code the config-loader (config-loader.js) should look like.
const convict = require("convict");
const dotenv = require("dotenv");

dotenv.config();

const config = convict({
  env: {
    doc: "The application environment.",
    format: ["production", "development", "test", "local", "stage"],
    default: "local",
    env: "NODE_ENV"
  },
});

config.validate({ allowed: "strict" });

module.exports = () => {
  return { code: "module.exports = " + JSON.stringify(config.getProperties()) };
};
Since it’s only a JavaScript module, we should create a typing, and export it as a TypeScript constant. This is the config wrapper, which enforces the typing to the loaded config object (config.ts):
import * as loadedConfig from "!val-loader!./config-loader";

export interface IConfig {
  env: "production" | "development" | "test" | "local" | "stage";
}

export const config = loadedConfig as IConfig;
When we reach this part, we should get a TypeScript error:
Cannot find module '!val-loader!./config-loader'.The reason is that TypeScript doesn’t know what is the !val-loader! part in the path.
It’s only needed for the webpack to know this file should be converted with the val-loader. To resolve this issue, we should add a typing for this type of imports.
We’ll cast every val-loader loaded module to type any because after import, we should create a typing for the module. The typing is the following:
typings.d.ts
declare module "!val-loader!*" {
  const contents: any;
  export = contents;
}
After these preparations, we can easily import the config constant from config.ts, where we want to use any of the environment variables.
If we use this approach in an Angular application, we can use the config.ts in a service, and then just inject that service to any part of the project where we want to use the config variables.
config.service.ts
import { config } from "./config";

export class ConfigService {
  private cfg = config;

  getConfig() {
    return this.cfg;
  }
}
Conclusion
I hope this guide will help you manage frontend configuration with .env files. I made two proof-of-concept repositories (Angular and Vue.js) that use this integration.
They also contain an approach where convict isn’t used, only the plain dotenv npm package.
These repos are available following these links:
Further reading:
👉 8+1 Tips and Tricks for Building Large-Scale Enterprise Angular Applications
👉 Fabric.js Tutorial: The Ultimate Guide to Objects and Complex Shapes


